I have been working a lot recently with SharePoint REST API. More specifically calling it in power automate to build document libraries, apply columns and views. While doing this for a client that required group by columns I was asked if I could remove the column prefix from the group by.
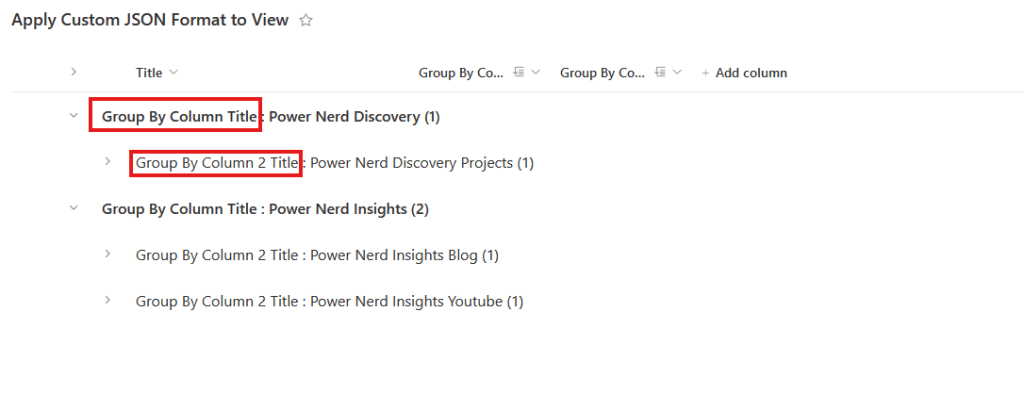
As you can see in the image the group by column title is added as a prefix to all the values. Normally to remove this you would have to apply a custom JSON format to the view at the list but this isn’t practical if we are building our lists using power automate. So how do we acheive this.
Step 1: Set a variable – Following a bit of lessons learned, start off your flow with an initialize variable step with the JSON format you are looking to apply in the value field. This makes it easier to refer to later in your flow when you send the request to sharepoint to apply the view. The JSON formatting code I am using today removes the prefixes of group by filters and can be found below but this method works with other custom format JSON as well.
{
  "$schema": "https://developer.microsoft.com/json-schemas/sp/v2/row-formatting.schema.json",
  "groupProps": {
    "headerFormatter": {
      "elmType": "div",
      "style": {
        "padding-left": "12px",
        "font-size": "16px",
        "font-weight": "400",
        "cursor": "pointer",
        "outline": "0px",
        "white-space": "nowrap",
        "text-overflow": "ellipsis"
      },
      "customRowAction": {
        "action": "defaultClick"
      },
      "children": [
        {
          "elmType": "div",
          "children": [
            {
              "elmType": "span",
              "style": {
                "padding": "5px 5px 5px 5px"
              },
              "txtContent": "@group.fieldData.displayValue"
            }
          ]
        },
        {
          "elmType": "div",
          "children": [
            {
              "elmType": "div",
              "style": {
                "display": "flex",
                "flex-direction": "row",
                "justify-content": "center"
              },
              "children": [
                {
                  "elmType": "div",
                  "txtContent": "=' (' + @group.count + ')'"
                }
              ]
            }
          ]
        }
      ]
    }
  }
}
Step 2: Get the view ID – this is necessary to apply our custom format. to do this we’ll need 3 actions, the first is a ‘Send an HTTP request to SharePoint’ action. It should be structured as below

We then need a ‘Parse JSON’ action, the content should be the ‘body’ dynamic content of the above action and the schema should be
{
    "type": "object",
    "properties": {
        "d": {
            "type": "object",
            "properties": {
                "results": {
                    "type": "array",
                    "items": {
                        "type": "object",
                        "properties": {
                            "__metadata": {
                                "type": "object",
                                "properties": {
                                    "id": {
                                        "type": "string"
                                    },
                                    "uri": {
                                        "type": "string"
                                    },
                                    "type": {
                                        "type": "string"
                                    }
                                }
                            },
                            "Id": {
                                "type": "string"
                            }
                        },
                        "required": [
                            "__metadata",
                            "Id"
                        ]
                    }
                }
            }
        }
    }
}
After this we’ll need a compose step to pull out the required ID, the inputs of this step should be an expression with the below code
first(body('Parse_JSON')?['d']?['results'])?['Id']The ‘outputs’ of this compose step should now represent the view ID.
Step 3. Format the Custom JSON format variable – due to how power automate accepts string inputs in the body of the ‘Send an HTTP request to SharePoint’ action we’ll need an additonal compose step with the below code to have it accept our custom JSON formatter.
replace(variables('varCustomFormatter'),'''','\''')Step 4. Send an HTTP request to Sharepoint – now we have all the information we need to send an HTTP request to sharepoint to apply our custom JSON format. Your action should look like the below

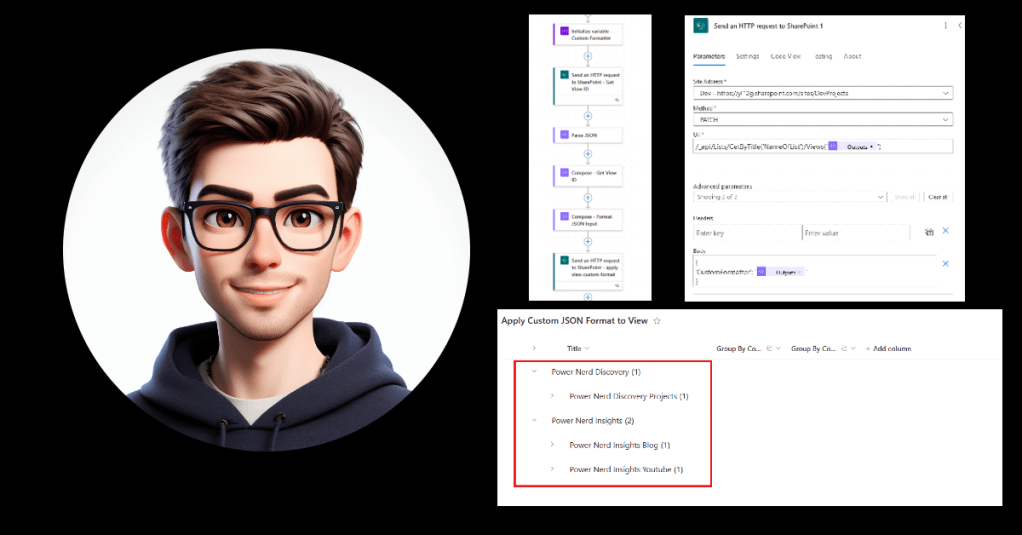
When creating this step the ‘Outputs’ in the URI should be from your compose step we created in step 2 and the ‘Outputs’ in body should be from the compose step we created in step 3. So now your flow should look something like this

And when run your group by filters should look like this

I hope you find this helpful and if you have any feedback or would like to work with me feel free to message me on LinkedIn.


Leave a comment